Add address fields to your checkout that autocomplete and auto-localize.
Asking for address on a checkout has historically been one of the slower parts of completing a purchase which is why we’ve special built an optimized address block to minimize it’s affect on conversion rate.
Here are a few things the address block does for you right out of the box:
- Autocomplete the customer’s address as they type using Google Maps
- Detect a customer’s location and move their country to the top dynamically
- Localize labels based on the customer’s country
- Show a state or province dropdown when available
- Optimize the order of the fields with a modified layout
Table of Contents
Add an address block
To add an address, while editing a checkout click Add Section (or Add Block) in the editor canvas and select Address. This will open the Settings panel for your new address block. Then just choose a Field where you want to save this address—billing and shipping address fields exist by default.
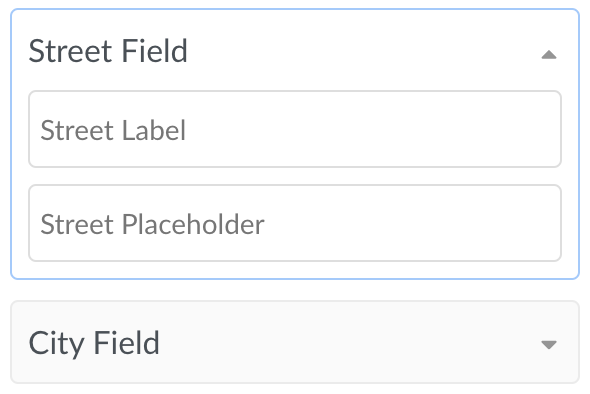
Edit field labels
In the address block Settings panel you can change all the field labels and placeholders.
Collect two addresses
In the address block Settings panel you can enable collecting a second address. This will enable a second set of address fields that can be auto-filled with the first address or changed by the customer—the typical “Is billing same as shipping?” feature.
Exclude Countries
In the Address settings sidebar, open the Country Field section. From there, select any countries you don’t want to include from the Excluded Countries drop-down list.

Tip: If you need to set up a checkout to allow for only a small number of countries, click Select All, then simply remove the countries you want to allow.